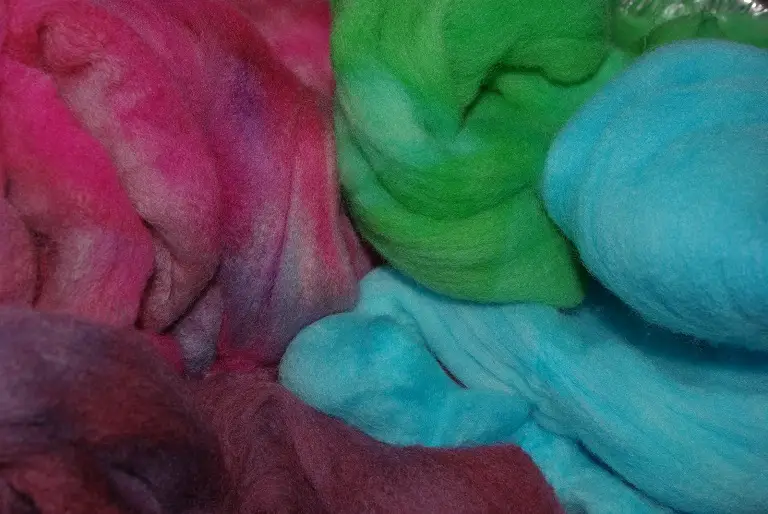
Wool roving is a versatile material used in various crafting projects, from knitting and crocheting to felting and spinning. However, sometimes the colors available in stores may not meet your needs or match your vision. That’s where dyeing wool roving comes in. Dyeing wool roving allows you to customize your projects with the colors and patterns of your choice. In this guide, we’ll provide you with a step-by-step process on how to dye wool roving so that you can create unique, beautiful projects.

Methods of How to Dyeing Wool Roving
There are various methods for dyeing wool roving, each with its process and outcome. Some popular methods include solid-color dyeing, dip-dyeing, and hand painting. Each method allows for unique color effects and can create stunning wool roving for a range of crafting projects. You can achieve vibrant, long-lasting color in your wool roving by following the proper steps and techniques.
The Complete List of Materials Needed for Dye Wool Roving
To dye wool roving, you will need a few basic materials. The specific materials you need will depend on the dyeing technique and the dye you choose. Here is a comprehensive list of materials for dyeing wool roving.
- Wool roving
- Acid dye
- White vinegar
- Large pot or dyeing vessel
- Water
- Stirring spoon or tongs
- Measuring cups and spoons
- Thermometer
- Gloves
- Protective eyewear
The Following Methods Can Be Used to Dye Wool Roving
Different methods exist for dyeing wool roving, each with a distinct process and outcome. Some popular methods include solid-color dyeing, dip-dyeing, and hand painting. Each method can create different effects and styles, depending on the desired outcome.
Method 1. Solid-Color Dyeing
We use solid-color dyeing to dye the entire wool roving in a single color. This method is simple and can create a wide range of solid colors. To achieve a consistent color, one should carefully follow several steps involved in the solid-color dyeing process.
Step 1. Prepare the Dye Bath
Choose a large pot that will fit the wool roving comfortably without being too crowded. Fill the pot with enough water to cover the wool roving fully, and add the desired amount of dye. Add a tablespoon of white vinegar or citric acid per pound of wool roving for acid dyes to help the dye adhere.
Step 2. Heat the Dye Bath
Place the pot on a stove or other heat source and bring the water to a temperature of about 180-200°F (82-93°C). Stir the water occasionally to make sure the dye is fully dissolved.
Step 3. Add the Wool Roving
Gently place the wool roving in the dye bath to ensure it’s fully submerged. Avoid stirring the wool too much at this stage, as it can cause felting.
Step 4. Stir the Wool Roving
Use a spoon or tongs to gently stir the wool roving in the dye bath to ensure even dyeing. Stir gently and avoid agitating the wool too much, as it can also cause felting.
Step 5. Soak the Wool Roving
Let the wool roving soak in the dye bath for 30-60 minutes or until the desired color is achieved. The longer you leave the wool in the dye bath, the deeper the color.
Step 6. Rinse the Wool Roving
Remove the wool roving from the dye bath and rinse it in lukewarm water until it clears. Gently squeeze out excess water, but avoid wringing or twisting the wool, as it can cause felting.
Step 7. Wool Roving Storage
Lay the wool roving flat to dry, avoiding direct sunlight or heat sources. Once dry, store it in a cool, dry place to avoid any moisture or humidity.
Method 2. Dip-Dyeing
We use dip-dyeing to partially submerge the wool roving in the dye bath, which creates a gradient effect. This method enables us to produce unique color transitions and ombre effects. It involves careful dipping and gradual submersion of the wool roving to achieve the desired effect.
Step 1. Prepare the Dye Bath
Choose a large pot that will fit half of the wool roving comfortably without being too crowded. Fill the pot with enough water to cover half of the wool roving, and add the desired amount of dye. Add a tablespoon of white vinegar or citric acid per pound of wool roving for acid dyes to help the dye adhere.
Step 2. Heat the Dye Bath
Place the pot on a stove or other heat source and bring the water to a temperature of about 180-200°F (82-93°C). Stir the water occasionally to make sure the dye is fully dissolved.
Step 3. Dip the Wool Roving
Carefully dip one end of the wool roving into the dye bath and hold it in place for a few minutes. Make sure the wool is fully submerged up to the desired level.
Step 4. Float Wool Roving Slowly
Slowly lower the wool roving into the dye bath, holding it in place for a few minutes at each level until the desired gradient effect is achieved. Keep the wool roving moving gently to avoid any harsh lines or spots.
Step 5. Rinse the Wool Roving
Remove the wool roving from the dye bath and rinse it in lukewarm water until it clears. Gently squeeze out excess water, but avoid wringing or twisting the wool.
Step 6. Dry and Store the Wool Roving
Lay the wool roving flat to dry, avoiding direct sunlight or heat sources. Once dry, store it in a cool, dry place to avoid any moisture or humidity.
Method 3. Hand-Painting
Hand-painting is a method used to apply dye directly to the wool roving, allowing for creative designs and patterns. This method is ideal for creating unique pieces with unique color combinations and intricate designs. It involves painting the dye onto the wool roving and setting it to achieve a long-lasting finish.
Step 1. Prepare the Dye Solution
Mix the desired amount of dye with water and white vinegar or citric acid in a bowl or spray bottle. The amount of water you need will depend on how much wool roving you’re dyeing and the intensity of color you want to achieve. Generally, a ratio of 1:1 for dye and water is a good starting point. However, you can use more water if you want a lighter color.
Step 2. Lay Out the Wool Roving
Spread the roving wool flat on a work surface, ensuring it’s clean and dry. You can place it on a plastic or dyeing mat to protect your work surface and prevent dye from seeping through.
Step 3. Apply the Dye
Use a brush, sponge, or spray bottle to apply the dye to the wool roving, creating the desired design or pattern. You can use one color or multiple colors, depending on your preference. Experiment with techniques like painting stripes and dots or blending colors together.
Step 4. Let the Dye Set
Once you’ve applied the dye, cover the wool roving with plastic wrap or a plastic bag to help the dye set and prevent drying out. The time you leave the dye to set will depend on the dye and the intensity of the color you want to achieve. Generally, it’s best to let the wool roving sit for at least several hours or overnight.
Step 5. Heat-Set the Dye
Once the dye has set, you’ll need to heat-set it to ensure the color stays vibrant and doesn’t bleed or fade. The best way to heat-set wool roving is by steaming or microwaving it. To steam, place the wool roving on a rack or steaming basket over a pot of boiling water for about 30 minutes. To microwave, wrap the wool roving in plastic wrap and microwave it for 2-3 minutes on high.
Step 6. Rinse the Wool Roving
Once the wool roving has been heat-set, remove the plastic wrap and rinse the wool roving in lukewarm water until the water runs clear. Be gentle when rinsing to avoid felting the wool.
Step 7. Dry and Store the Wool Roving
Gently squeeze out excess water from the wool roving and lay it flat to dry. Avoid wringing or twisting the wool roving, as this can damage the fibers. Once dry, store the wool roving in a cool, dry place.
Frequently Asked Questions and Answers
What kind of yarn can you dye?
We can dye the blends of natural and acrylic fibers. However, such a combination often takes a different appearance. Plant or animal fibers like wool, alpaca, cashmere, and angora are dyed well.
How do you stop wool from dyeing when felting?
Well, for this, you must not rinse. Put room-temperature wool into a hot dye bath. Also, leave the option of hot wool in room temperature water when felting. It will help you avoid the shock of the sudden temperature change.
How do you darken wool?
You will require salt or vinegar to darken wool, provided you are dyeing Silk, Cotton, Wool, Nylon, Rayon, Linen, or Ramie. And if you increase color, you need to add one cup of salt while dyeing fabrics, provided the fabrics comprise nylon, silk, or wool.
Conclusion
Dyeing wool roving can be a fun and rewarding process that allows you to create unique and beautiful colors and patterns. You can achieve vibrant and long-lasting results by following the steps and techniques for solid-color dyeing, dip-dyeing, or hand-painting. Whether you’re a seasoned crafter or a beginner, dyeing wool roving is a creative and satisfying way to add color and texture to your projects. With a little practice and experimentation, you can create stunning wool roving that will envy all your crafting friends.
Leave a Reply