If you differentiate between drafting fibers and flicking a spindle, they take almost the same time to learn. But, when we are talking about plying yarn, you need very little time to learn it compared to others. It is possible only because of its simplicity. Once you understand the system correctly, you’ll be able to ply any kind of yarn quickly and easily. So, here is a quick guide to plying yarn in several different ways.
How To Ply Yarn: Step-By-Step Process
After you understand the way of spinning the yarns, plying is a simple task for you. So, you need to figure out the method you want to use for plying the yarns and what is the suitable way of holding or twisting the yarns to make it successful. In this article, we’ll show you several techniques which you can use to ply yarn.
1. Plying On A Spindle
Using a spindle for plying yarn is very popular among professionals. Because this method is not only easy but also has many variations for the plying process. In this method, you can use clay flower pots or small balls for storing yarn before plying, where the pots hold the ball and the balls hold the yarn.
Besides, you can also use weaving bobbins and a lazy kate to hold singles, the same as how you would ply on a wheel. To transfer the yarn from your spindle, you can use a shoebox with a hole punched on the side as a spindle holder. As a result, you can keep both hands free for winding, and the box will keep the spindle steady. Let’s focus on the step-by-step process now.
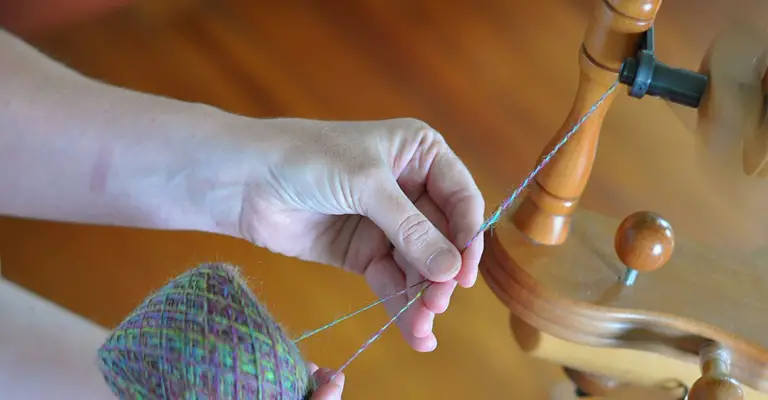
- First, you need to tie your two singles using an overhand knot. And, the singles will be attached to the leader of your spindle.
- Then, put a finger between them when holding the yarns in your fiber hand. This task is necessary to prevent twisting until you are ready to go.
- Now, mark the direction where your singles were spun. And, turn the spindle in the opposite direction using your twisted hand.
- After the spindle starts turning, let the plying twist run into the specific section. And, before allowing it to do such, slide the twisting hand up and pull down the lengths of yarn.
- Always make sure that the yarns are getting tensioned evenly as you ply and pull out another length of yarn when it has enough twists. Then, add more twists till the spindle reaches the floor.
- Finally, you can stop plying. Remember that the spindle shaft should be the place where you’ll wind yarns. In this way, you can complete your plying task on a spindle.
2. Plying With A Lazy Kate
If you are an expert weaver or have a friend who knows the weaving process, you can try this technique to ply yarn. Because to find a better output, the entire method depends on a good weaving process.
- First, find the bobbin winder and use the boat shuttle bobbin on it. Then, imagine winding a bobbin for weaving and following the same way to wind the singles from your spindle onto the bobbin. Not to mention, the bobbin is secured in the shoe box.
- Don’t forget that you should use a smoothly wound bobbing to make the plying process a breeze.
- Then, fill a second bobbin and put it on a lazy kate. Now, you are ready to go.
3. Flowerpot Plying
We’ve already mentioned how you can utilize the flowerpots for plying yarns. After setting them up, find some rubber balls and arrange them with the flowerpots to start the process.
- In the first place, you need to take the spindle to spin the singles. Next, use the rubber balls or small felt to wind around in a firm position.
- Always try to keep the yarn under tension because it helps even out the twist and makes playing easier.
- Then, you should spin more yarn and use an extra ball to add more yarn.
- The placement of each ball will be its flowerpot, which should be arranged upside-down. Arranging in such a way can help so that the balls don’t run amuck.
- Finally, find the drainage holes in the pots and thread the yarn through them to start playing.
4. Plying With A Wheel
When you want many singles in a single-plying process, you can use this technique. Because you can take whatever number of singles you want using a wheel.
- Firstly, attach the singles to the wheel edges and hold them tightly on a finger.
- Use the wheel to twist the yarn and draft directly to the bobbin.
- Using a wheel, you can spin the single within one-third of the average time. Because you can spin at a higher speed in a wheel and make the fabric using more yarn.
- Use different twists to get different yarn designs and stop when you’re done.
5. Holding By Hands
People often ignore this area of expertise, and the output negatively impacts it. So, you should be careful when it comes to hand-holding tasks of plying. Usually, we suggest holding your hands in the way of old British-style plying.
- First, organize the singles and fix the drafting hand.
- Then, use the middle finger of your drafting hand under the thread and push it through the “V” that they form as they enter the orifice, the palm of your hand facing you.
- Specifically, the middle finger will make sure that the twist enters the threads at the same time, and you can start spinning with a short draw.
- Use your tensioning hand to keep everything in order and prevent chaos. And, keep the hand glued in a stable position, and don’t move it.
- Finally, start the wheel in the opposite direction in which the singles were spun. Now, you can finish your plying after getting your desired amount.
Conclusion
If you get a little more practice when plying yarn, the whole process will be pretty straightforward for you. After that, you can refine your techniques and experiment with different methods. In this way, you can find the perfect plying pattern for you. However, you should be careful holding your hands if you want to get a good fabric from the plied yarn.
Leave a Reply