If you want to thread your serger machine like a pro, learning how to use the basic sewing tools is the first thing you need. Then choose the stitch you desire and set the machine accordingly. While you are threading for the first time, following the user manual can be a great idea, or you can take help from the built-in threading chart. Want to learn how to use a serger machine? Check this article.
For Newbies: Why Thread You Overlocker in the First Place?
A serger or overlock machine can be a great companion to your sewing machine. Overlocker and serger both are two different names of the same machine. While the Americans refer to this machine as a serger, the others call this overlocker.
When it comes to its application, a serger is used to give finished seams to garments or other products. To do hems, professional seams, seam finishes, nicely decorated edges, serger machine is second to none.
How to Thread Serger Machine
Setting up the serger can be a tricky task to do. But feel free to change and adjust the machine.
Step 0: Before Getting Started
Now to get started to thread with your serger machine, you will need some basic sewing tools and they are mentioned down below:
- Serger machine
- Serger machine manual
- Tweezers
- Four spools of thread
- Thread scissors.
- Fabric
As you kick-off, you need to check some settings on your serger machine.
Stitch Length
Usually, it dictates how long you want your stitches to be. If your serger measurements are in millimeters, 3mm can be a standard option.
Stitch Width
Stitch width determines, how deep you want your stitches to be. You will find the range between 5 to 7mm where 5mm is considered to be standard.
Differential Feed
Differential feed dictates the movement of the rear feed and the front feed and eventually, that controls how your fabrics are being pulled by the feed. You can keep your differential feed to 1 if you want the rear feed and front feed to pull your fabric under the foot evenly. This way you can avoid gathering or pucker in the fabric.
Blade lever
To trim the excess fabric instantly, you may want to keep your knife down as you run fabric over the serger machine.
Tension Setting
Usually, it is better to reset all your tension dial at 4 as it will make the adjusting of the stitch tension easier later.
Now that we have gone through all our settings, finally, it is time for us to start threading the serger machine. Here we have mentioned the procedure step by step, follow these thoroughly for the best outcome.
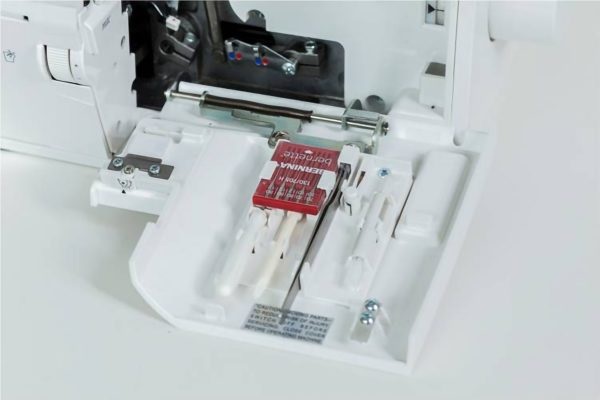
Step 1: Opening the machine
The interior of the serger machine is easy to access. You will find many useful tools for threading that are stored in the cover door. Essential tools like the screwdriver, tweezers, some spare needles, needle holders, and a lint brush are there to make your task easier.
Also, you will find a threading chart built-in behind the looper door when you open the machine. If you don’t have your usual manual around you, this might be useful to you.
Step 2: Raising the Presser Foot
To release the tension disks in all of the threads, you have to raise the presser foot. This way, threading will be easier and also, you will be able to tie the threads altogether. And then you can pull the threads through the serger machine easily.
Step 3: Removing the Presser Foot and Lowering the Blade
To keep the threading path open in the stitch plate, you have to remove the presser foot and lower the blade initially. This is a useful trick for you as you are learning how to thread for the first time.
Now you have to be careful when you put the presser foot on the machine as you may trap your thread into the clamp of this presser foot. And once you are doing well with threading the serger machine, you do not have to remove the presser foot or lower the blade anymore.
Step 4: Raising the Needles to the Topmost Position
On your serger or overlocker machine, there might be a feature for raising the needles to the highest position. In that case, you might notice a needle position window on the inner side of the machine.
You may have to move the handwheel of your serger machine till the red line reaches up the arrow on the needle window position that we have talked about earlier.
Step 5: Raising the Retractable Thread Stand
You have to pull the retractable thread stand up which is at the back of the serger machine. Then you can choose your thread and put it on the thread stand. After that, raise the thread to the top of the thread stand.
You may need to use the spool stabilizer, nets, and caps for thread, depending on how much the threads are being used.
Step 6: Placing the Thread Into the Pre-Tension Guide on the Top
To ensure that the thread will be flowing off into the machine through the spool, you have to floss your thread into the guide.
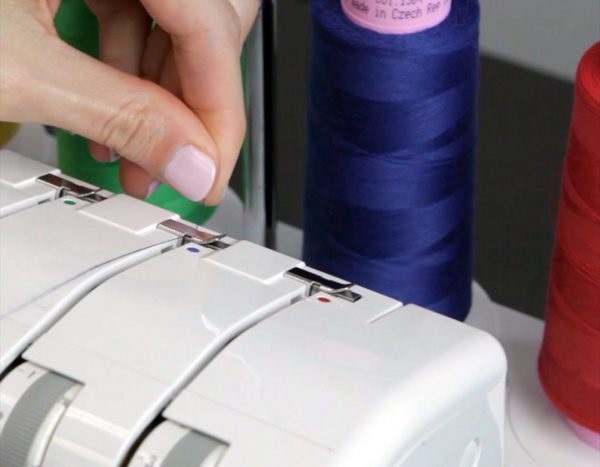
Step 7: Laying the Thread Into the Tension Disc
Now as you have raised the pressure foot, the disk must be open. And it is going to keep it easy to get the thread into your tension disk. Now you can easily follow the thread chart and place your thread with the color-coded dot.
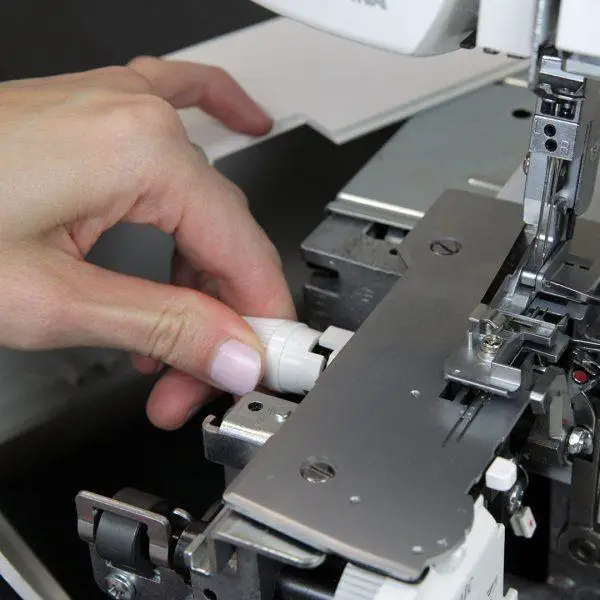
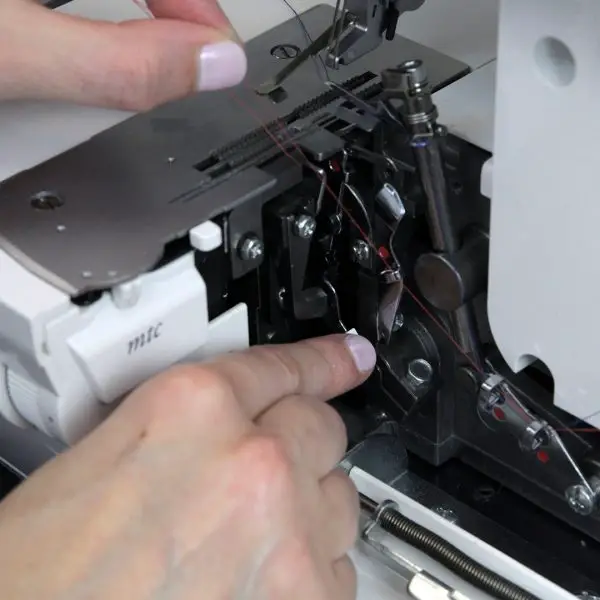
Step 8: Using the Lower Looper Threader Lever and Tweezers
Under the stitch plate there is a guide and to reach the guide, use the lower looper threader lever and hold it down and the guide will be moving out. Now place your thread in the guide and turn the handwheel to let the guide go back under the stitch plate.
Tweezers are very helpful in this process of threading the looper eye and setting the thread in the guides as well.
Step 9: Threading the Needles
Now that you have gone through all these steps, it is time to thread the needles. Based on what kind of stitches you want, you might want to thread the right or left needle or for 4 thread sergers, you may want to use both needles.
To be safe from malformed stitches or any other complications, you have to remove the remaining needles that are not being threaded. Once you have threaded the needles and gone through all the settings that are needed to be adjusted, you are done and good to go.
Step 10: Testing
You serger machine lets you have a lot of option when it comes to the setting. As there are tons of applications for this machine, setting up the machine might need some extra attention.
Frequently Asked Questions
Can a serger replace my sewing machine?
Though the versatility of the serger machine is unquestionable, some huge projects can be done all by the serger itself, serger is not an alternative for a sewing machine. Tasks like zippers, facings, buttonholes, topstitching can not be done by a serger.
Can I sew with a serger?
Yes, you can sew the seam and many more by serger. With the serger, you can do 4 thread safety stitches all by itself.
Conclusion
The serged seam is considered to be the premium standard in the knitting industry. So, this skillset will help you to have great finishes on all your knitting items. As long as you follow the manual, there is nothing to be worried about.

Leave a Reply