When someone looks for dyeing instead of painting, it means that person wants the wood grain to show through the color. Pretty sure that you are one of them. No matter whether it is a finished or unfinished wood surface, you can do it! Yes! And you would be glad to know that wood absorbs the dye so beautifully that the color does not peel like paint!
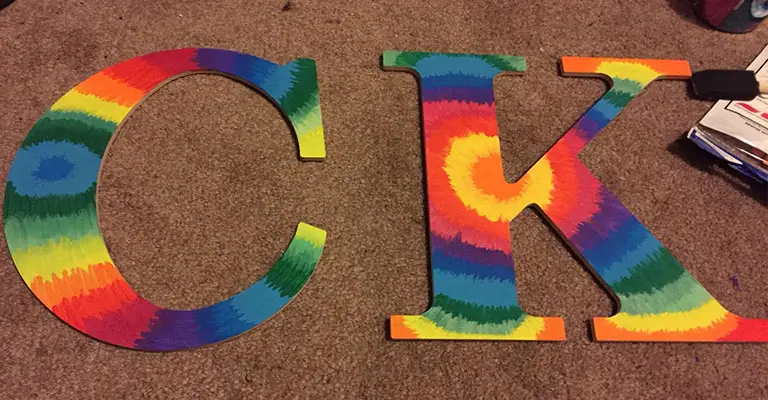
How to Tie Dye Wood?
You can even tie on your small wooden stuff though “tie-dying wood” is most suitable for large projects. Now, have you managed some wood and dye to start the experiment?
Alright, then let’s go! Have a quick look at the points below and follow the steps afterward.
What Are the Things You Will Need to Tie Dye Wood?
- Elmer’s blue school glue
- Wood canvas
- RIT dye
- Paintbrush
- Old towels or rags
- Iron
Step One
Before all, apply glue to the wood canvas. And the choice of pattern is up to you. Feel free! You will be greatly benefitted while working with large shapes. After gluing, let your project overnight.
Step Two
Get a paintbrush along with RIT dye. Drip your dye and start painting on the wood canvas. Do it in a circle approximately. Choose whether you will set out will blue or red!
Step Three
Next, wash the paintbrush between colors. If a certain color changes too much for your taste, use an old towel to wipe your paintbrush. And before continuing, you don’t need to wait for each color to dry. Keep painting on all of your colors following the precise need for a color mixture.
Step Four
Set your last color and conclude the entire canvas with that. Before continuing further, let the dye dry overnight.
Step Five
Has your dye dried? Alright, now have a slightly damp old cotton rag or towel. You need to fold it to the approximate size of the dried glue. Then lift the glue using hot water. Employ hot iron.
Step Six
Check the glue occasionally. Lift the rag to verify. Do not get frustrated if you fail to lift the dye out and out. Before reusing the glue, refold the rag to a clean side. It will reduce the risk of getting dye on your plain wood surface or mixing colors.
Step Seven
There will be a slight lifting on the glue edge by this time. The glue will start peeling back and off the canvas if you pull it on.
You have to push the glue off of the wood. It would help if you employed a plastic ruler or another plastic edge. The glue should appear on one sheet, and you will get undyed wood underneath.
Step Eight
Prior to displaying the whole project, apply a few coats of spray sealer. The tie-dye effort will be ready to demonstrate once the sealant gets dried.
Frequently Asked Questions and Answers
Question: What can you use to dye wood?
Answer: If you choose smaller pieces of wood, you had better use liquid watercolors. Let the wood get fully coated by dipping the wood into the paint. Use a wax paper sheet to dry. Else, you may use drink powder to dye your wood. Then you will need to mix it with water and paint it on the wood.
Question: How do you seal Rit dye on wood?
Answer: Employing a new foam or bristle brush, it would help if you used one or two coats of polyurethane. Use #220 grit fine sandpaper between coats in need. And a tack cloth will be enough to remove dust.
Question: Can you use food coloring to stain wood?
Answer: Food coloring can be affordable for a buyer compared to different wood stain colors. At the same time, it is pretty safe. No issues if there are some children in the working space.
Question: Can you use fabric dyes on wood?
Answer: Of course, you can use fabric dyes such as Rit dye on wood. The finish of this features greater texture and dimension
Question: Do you need to seal wood dye?
Answer: You can only color they wood with solvent or water-based stains. It is necessary to seal these stains. You may use varnish, wax or oil to seal them.
Question: Should I sand after dye?
Answer: Yeah, after dyeing, you are free to sand. It will help even out raised grain and bubbles.
Question: Can you naturally dye wood?
Answer: There are several natural ingredients like tea, herbs, tobacco, coffee, nut husks, etc that you can use to dye wood.
Leave a Reply