In only six easy steps, you can make G-tube pads that come in handy to prevent irritation around and below the G-tube. Plus, since you will be using flannel layers on either side, they will absorb any leakage from the tube whatsoever.
Speaking of that, making G-tube pads isn’t that big of a deal if you know how to sew. Besides, the necessary supplies for the project, mostly flannel and terry cloth, are pretty easy to get. It all begins with cutting a few circles and ends with installing the plastic snap into place. Here’s more on that note.
What Are G-Tube Pads For
G-tubes provide a path for foods and medicines directly into one’s stomach. Sometimes, it even works as a way of drainage or putting in the air. However, there can be leakages from the tube, especially with small children. That’s where G-tube pads prove useful, absorbing the leakage material and keeping things neat.
People of different ages, mostly children, need G-tube pads if they have certain medical conditions like the ones below.
- Neuromuscular disorder
- Food allergies
- Malnutrition
- Cystic fibrosis
- Cardiac diseases
- A condition where calory intake becomes problematic
- Gastroesophageal reflux
- Atresia
How Do You Make a G-Tube Pad | Steps to Follow
Follow these steps, and your G-tube pad will be ready in no time.
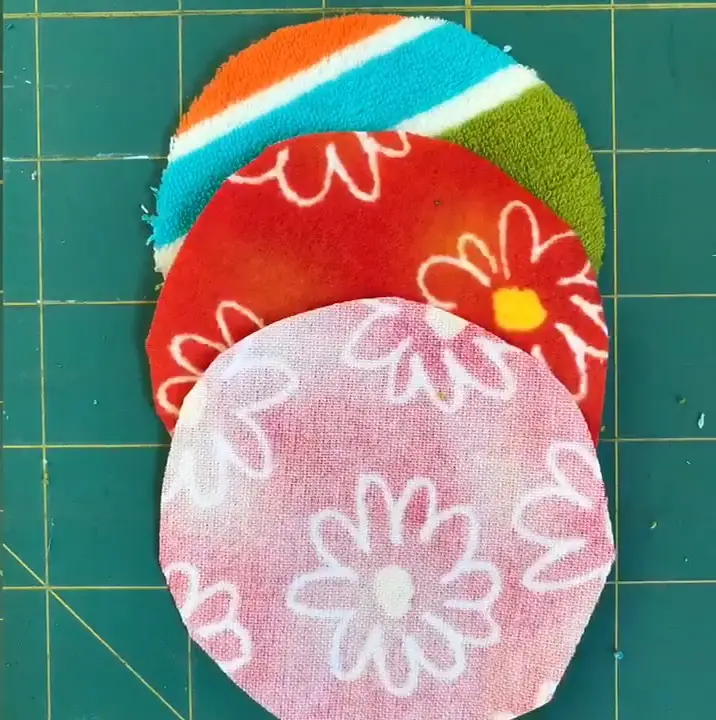
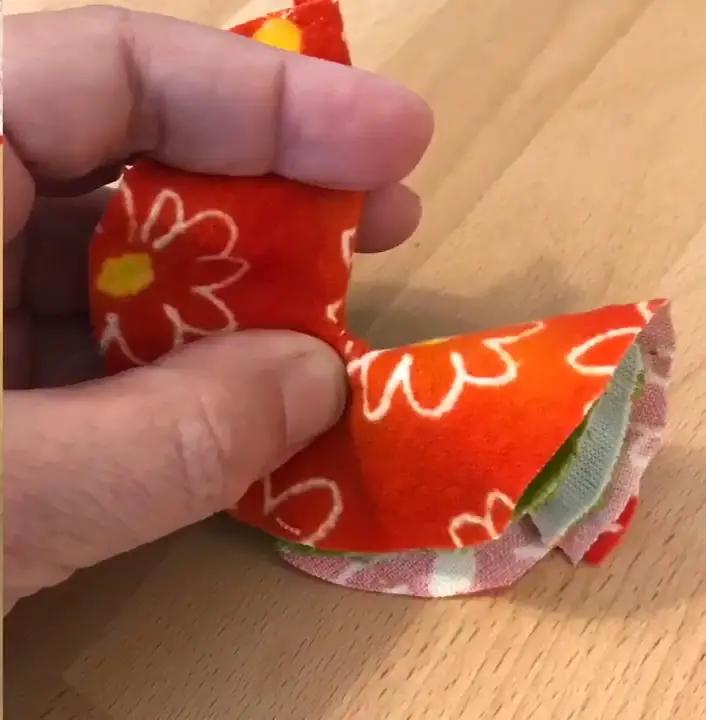
1. Cut 3 Circles
There will be three layers in the G-tube pad, two flannel layers, and one terry cloth layer. Generally placed in between the flannel ones, the terry cloth layer serves as an absorbent. And the flannels on either side of the pad help avoid irritation whenever in contact with the skin. So, to begin with, cut the three mentioned layers, each of the same size.
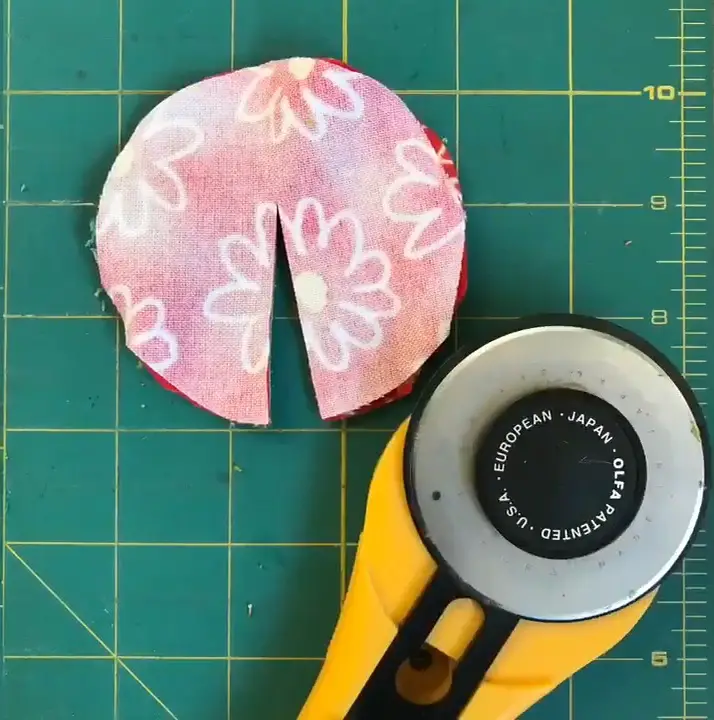
2. Make a 2-Inch Slit Down the Middle of Each Layer
Since the G-tube will go through the pad, an opening is required right in the middle. Stack the three circular layers on top of one another such that the two flannel layers face each other on their right sides. Place the terry cloth layer on top of the stack.
Now, cut a slit with a size no more than 2 inches through the center of the layers.
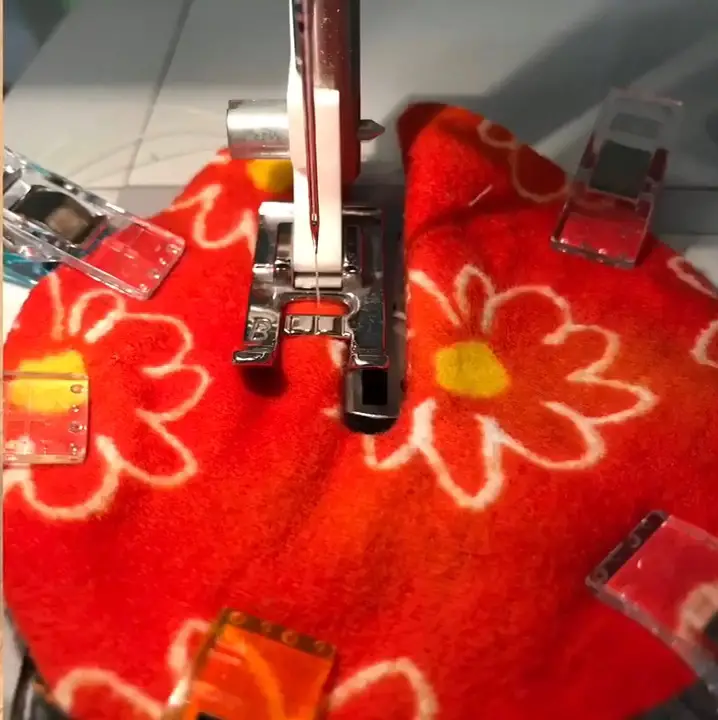
3. Sew the Inner Edge With a 1/8-Inch Seam Allowance
At this step, you have to use a 1/8-inch seam allowance and sew the inner edges of all the circles. The first seam should go just past the middle point, after which you need to turn them around and sew a row to form a curve.
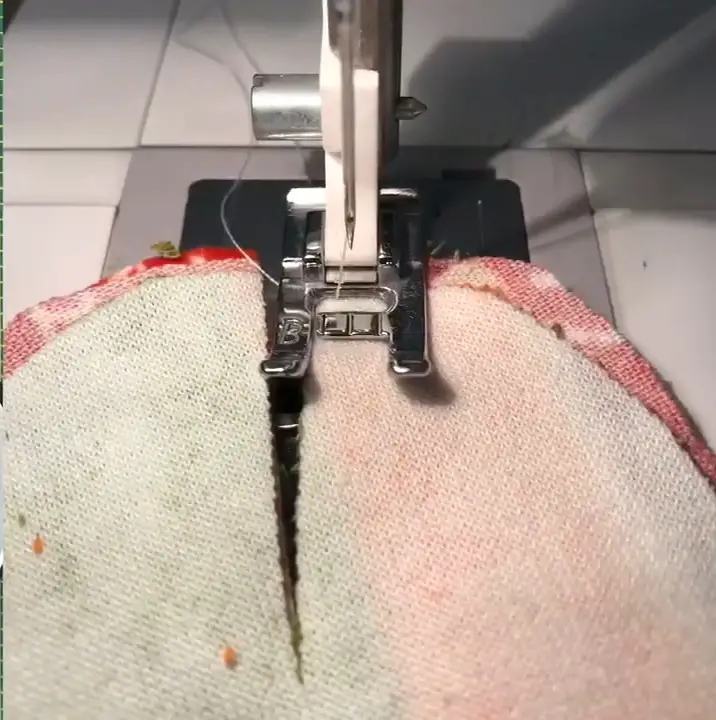
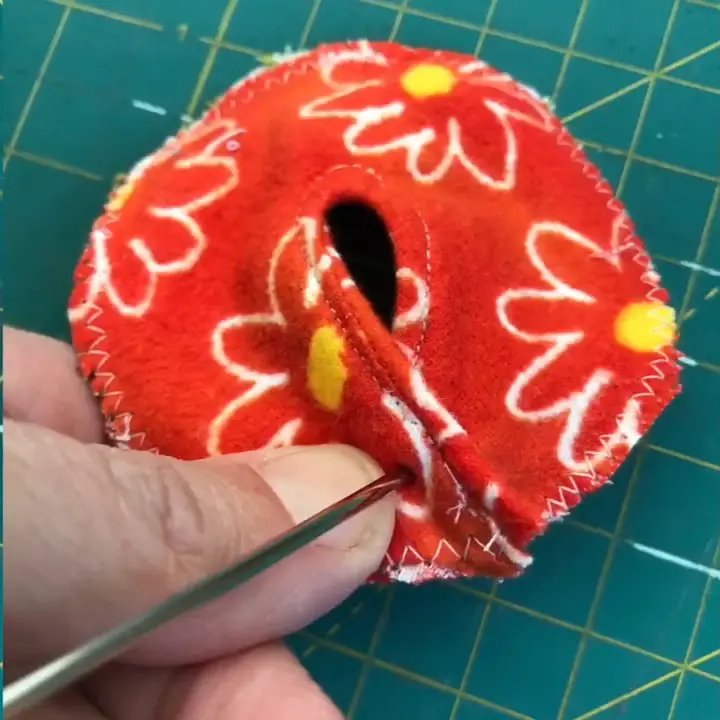
Next, create two tiny snips on the inside seam near the top. Doing so will come in handy when executing the fourth step.
4. Turn the Flannel Layers Right Sides Out
Start by turning one edge of the fabric and moving slowly along the curve. After that, open it up and fold it over.
Once you are done folding around the seam, secure the edges with a clip to make the upcoming sewing process convenient. Also, you can try pressing the seam with your fingers for further convenience.
5. Stitch the Inside Seam as well as the Outer Edge
Use a 1/8-inch seam allowance and top stitches on the inside seam to get a more polished look. The combination will also help you form the shape in a breeze. You can, however, use a different stitch to get the job done. But unfortunately, it won’t look nearly so defined.
Besides, you may have to work with even more defined and smaller circle cutouts at the center. In that case, using an embroidery machine makes more sense, as standard sewing machines seem to work better with larger circles.
Once the inside seam gets completed, go for the outside edges. We recommend using a zigzag stitch since it helps hold the edges better in the long run.
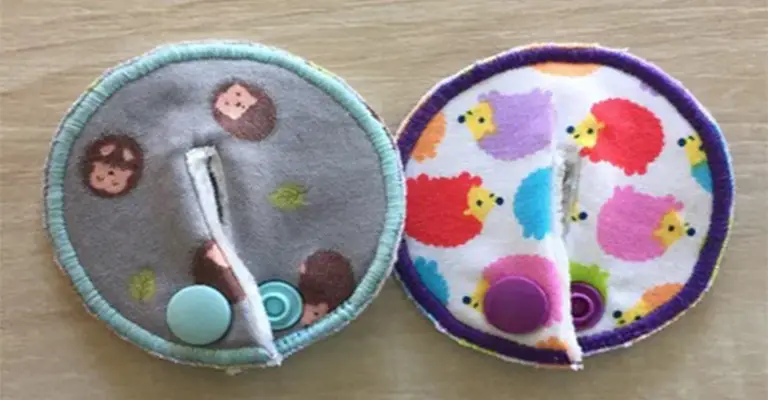
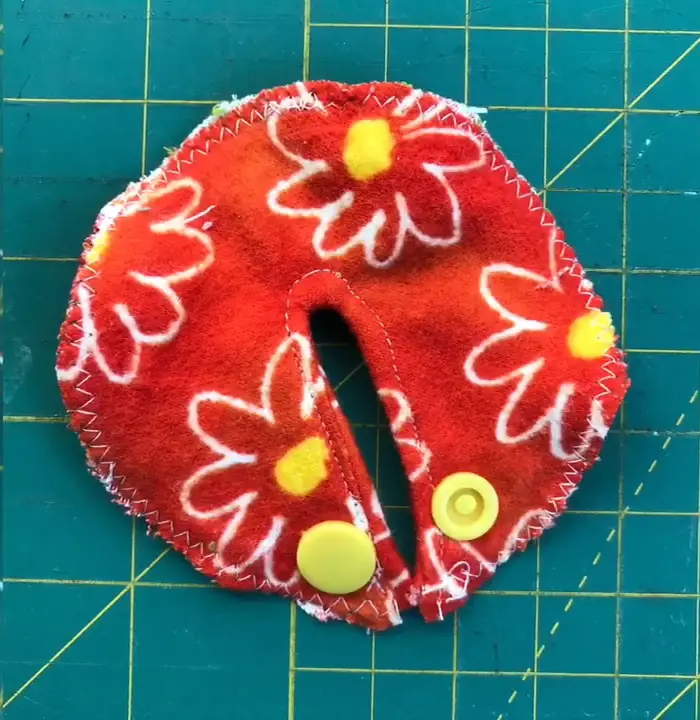
6. Place the Plastic Snap
First, you have to make holes where a piece of plastic snap will get installed. The best way to do so is by poking right through both sides together so that they align perfectly.
After the holes are ready, install the plastic snap in the gaps you made, and you finally have your first G-tube pad, all set to use.
How Do You Keep the G-Tube in Place
Dangling G-tubes can be a pain in the neck, which you can often get over by pinning or taping. Also, wearing certain clothes can help you avoid slack. However, you should still stay aware and try to reassess the tube placement every now and then. Try to keep the typical protruding distance of the tube so that it does not end up pulling out of or into the stomach.
Frequently Asked Questions (FAQs)
How often should I change G-tube pads?
Keeping a G-tube pad on for too long is not a good idea as it may cause infections. Therefore, try to change it as often as possible, at least twice a day. Do it first thing in the morning before the day’s first feed and again at night, before bedtime.
What to use to clean around the feeding tube?
It will be best to use soap with hot water to thoroughly clean the area before placing a fresh new G-tube pad.
How often should the G-tube be changed?
It is best to change balloon G-tubes after every 6-8 months. Otherwise, the balloon might start to wear out or leak, eventually causing the G-tube to fall out. As for the feeding extension set, it requires replacement every 30 days.
Bottom Line
Now that you know how to make G-tube pads try to have quite a few of them. That is because G-tube pads work best if changed frequently enough. Otherwise, the constant absorption of tube leakage for too long can cause more harm than good.

Leave a Reply